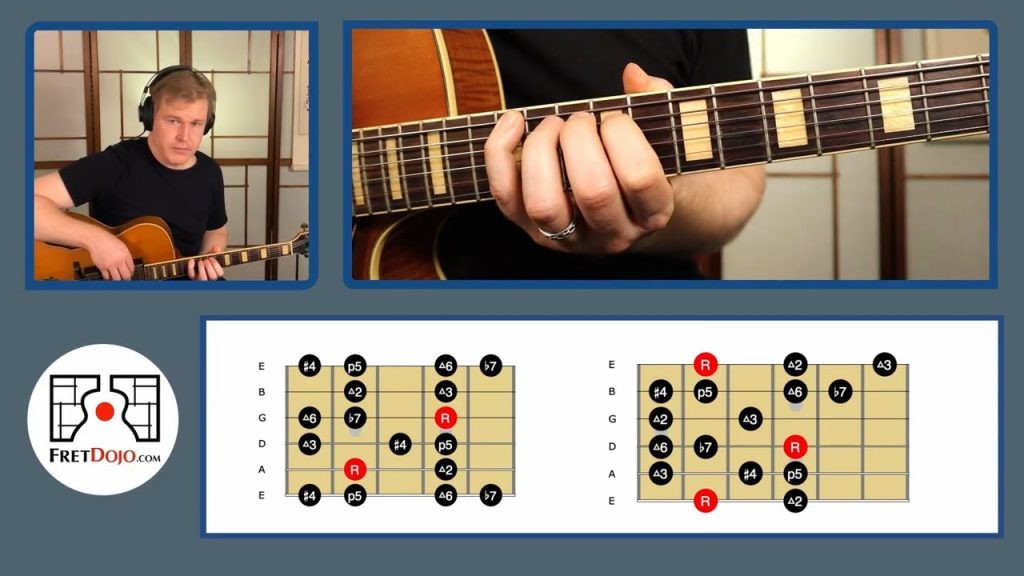
Lydian Dominant Scale (Guitar Lesson) – Ultimate Guide
Does the Lydian Dominant Scale seem somewhat cryptic to you? If you’re a guitarist looking to put some more spice into your […]
Does the Lydian Dominant Scale seem somewhat cryptic to you? If you’re a guitarist looking to put some more spice into your […]
Have you been struggling with jazz guitar improvisation and are wondering about the best jazz guitar scales to use? In this jazz
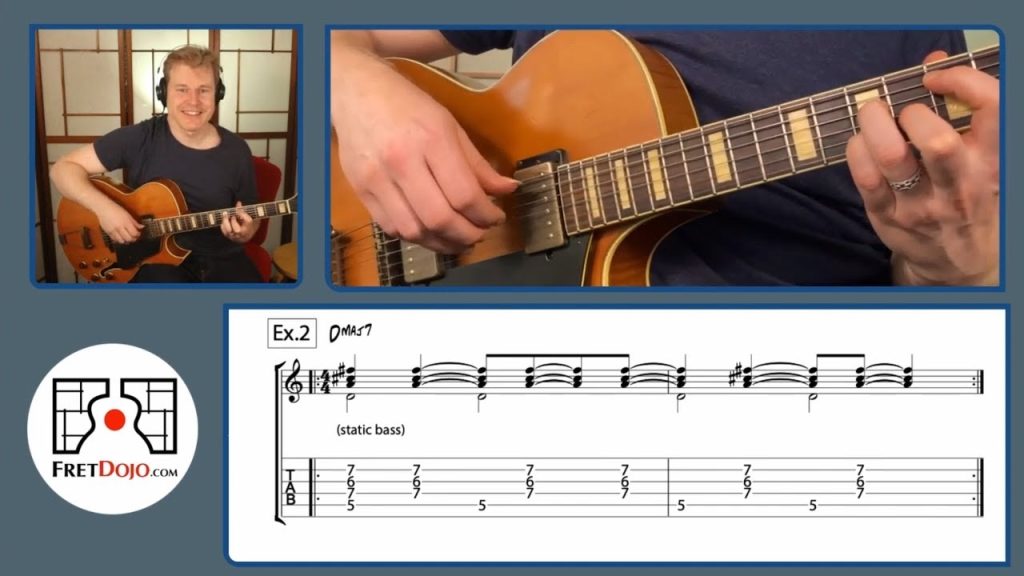
Yeah baby – in today’s beginner jazz guitar lesson you’ll learn a very cool bossa nova chords progression – and I’m going
How many different jazz guitar chords do you think you need to know to play jazz? I know what you’re thinking…a LOT.

Don’t have time to read this post now? Get your Handy PDF Download: Click this link to get a print friendly version of

Don’t have time to read this post now? Get your Handy PDF Download: Click this link to get a print friendly version of

If you’re here, you’re likely desperate to untangle the mystery of learning how to play jazz guitar. Help is at

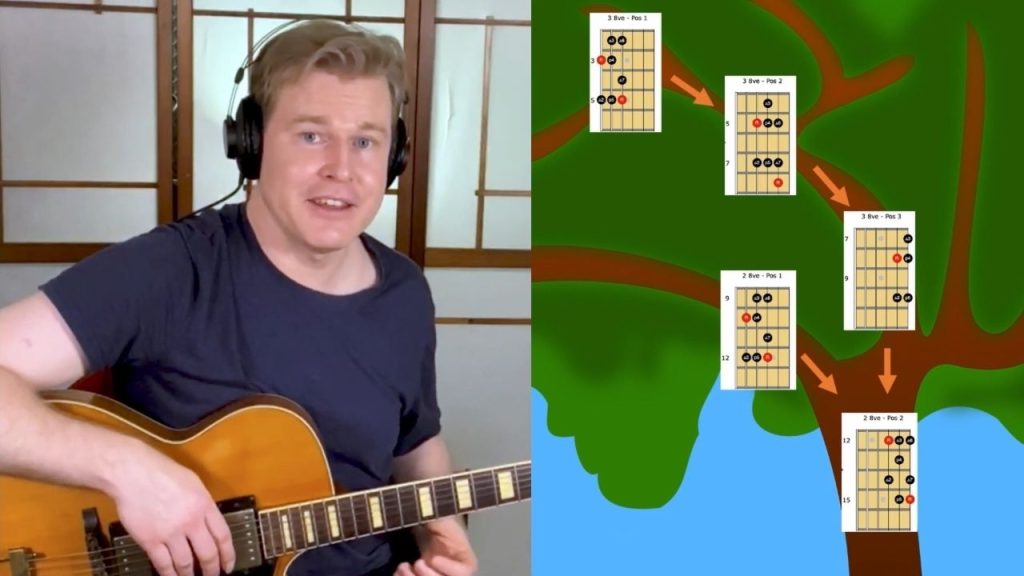
Welcome to this month’s free sample lesson from the FretDojo Academy’s latest course: Mind Expanding Triad Trip with Ant Law.